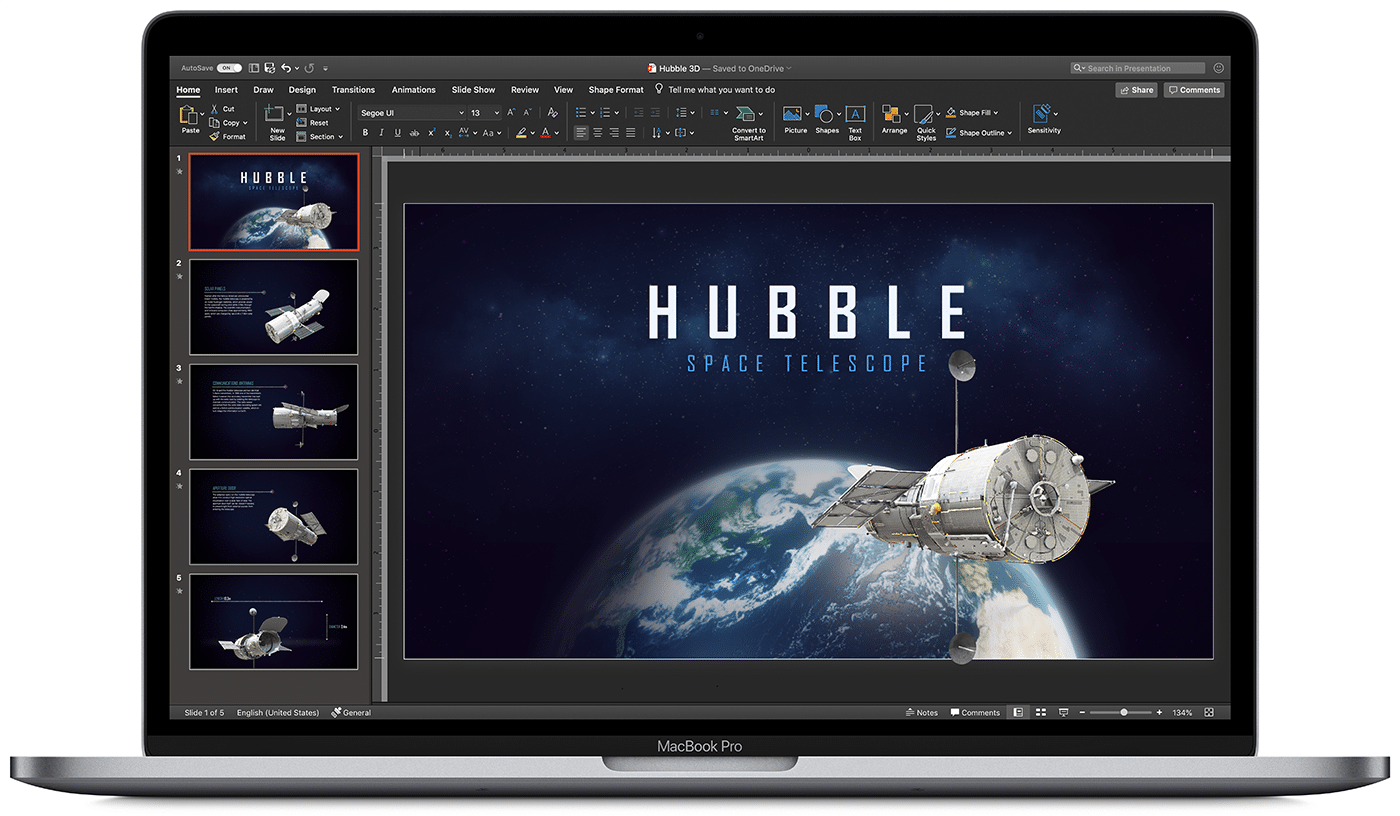
How to Use a Mac With PowerPoint: A Step-by-Step Guide
Using a Mac with PowerPoint is simple. First, make sure you have PowerPoint installed on your Mac. You can find it at the App Store or through a Microsoft 365 subscription. Open PowerPoint, and you’ll be greeted with a range of templates to start your presentation. From here, you can add text, images, and animations to create an engaging slideshow. Once done, you can present directly from your Mac or save your presentation to share with others.
After you’ve completed your PowerPoint presentation on your Mac, you’ll have a professional and compelling visual aid to support your speech or lecture. You can also share it with others or export it into different formats such as PDF, video, or even a web page.

Introduction
Are you ready to impress your audience with a stunning presentation? If you’re a Mac user, fear not – using PowerPoint on your macOS is as smooth as on any Windows PC. Let’s be honest, presentations are a part of life: whether you’re a student, a professional, or just someone with a story to tell, at some point, you’re going to need to put some slides together. PowerPoint for Mac has all the tools you need to create a presentation that’s both visually captivating and content-rich.
Why is this important? Well, PowerPoint presentations are a staple in the professional world. They’re used for everything from business pitches to academic lectures. Knowing how to create an effective PowerPoint presentation on your Mac could be the difference between persuading your audience or leaving them unimpressed. And who is this relevant to? Everyone! Whether you’re a newbie to presentations or a seasoned speaker looking to refine your skills, this guide will help you master PowerPoint on your Mac.
Step-by-Step Tutorial: Using PowerPoint on a Mac
Before jumping in, let’s clarify what you’ll achieve by following these steps. By the end, you’ll be able to create, edit, and present a PowerPoint slideshow on your Mac.
Step 1: Install PowerPoint
Install PowerPoint on your Mac from the App Store or through a Microsoft 365 subscription.
After installing PowerPoint, you’ll need to sign in with your Microsoft account to activate the software, then you’ll be ready to start creating your presentation.
Step 2: Open PowerPoint
Open PowerPoint and choose a template or open a blank presentation.
PowerPoint offers a variety of templates to suit different presentation styles. If you choose to start with a blank slate, you’ll have complete creative freedom.
Step 3: Add Content
Add slides and content such as text, images, and shapes to your presentation.
Remember to keep your slides simple and not clutter them with too much content. Visual aids should support your speech, not replace it.
Step 4: Customize Your Slides
Customize your slides’ design with themes, colors, and animations.
This step is where you can get creative with your presentation’s look and feel. Just be sure not to go overboard with animations – they should enhance your presentation, not distract from it.
Step 5: Present Your Slideshow
Present your slideshow directly from your Mac or save it to share with others.
You can start your presentation by clicking the ‘Slide Show’ tab and then ‘Play from Start’. Make sure you practice your presentation beforehand to ensure everything runs smoothly.
Additional Information
Now, let’s sprinkle in some extra tidbits that could elevate your PowerPoint game on a Mac. First off, did you know that PowerPoint for Mac supports real-time collaboration? Yup, you can work with your teammates on the same presentation at the same time, no matter where you are. And if you’re all about shortcuts, PowerPoint for Mac has plenty. For instance, pressing Command + Shift + N instantly creates a new slide.
Another neat feature is the Presenter View, which lets you see your notes, the upcoming slide, and a timer, all while the audience only sees the current slide. And for those who value accessibility, PowerPoint for Mac has tools to make presentations more accessible, including options for larger text and high contrast. Just remember, when using PowerPoint on a Mac, you have all the essentials at your fingertips to create presentations that are not just informational, but also memorable.
- Install PowerPoint on your Mac from the App Store or Microsoft 365.
- Open PowerPoint and select a template or start with a blank presentation.
- Add and customize your slides with text, images, and animations.
- Present directly from your Mac or save your presentation for later use.
Frequently Asked Questions
Can i use powerpoint on a mac.
Yes, PowerPoint is available for Mac users and can be downloaded from the App Store or included in a Microsoft 365 subscription.
Is PowerPoint for Mac different from Windows?
While there are some differences in design and available features, PowerPoint for Mac offers a comparable experience to the Windows version.
Can I collaborate with others using PowerPoint for Mac?
Absolutely! PowerPoint for Mac supports real-time collaboration, allowing multiple users to work on the same presentation simultaneously.
Can I open a PowerPoint presentation made on a Mac on a Windows PC?
Yes, presentations made in PowerPoint for Mac are compatible with PowerPoint for Windows, ensuring easy file sharing and collaboration.
Does PowerPoint for Mac support Presenter View?
Yes, Presenter View is available in PowerPoint for Mac, providing speakers with a private view of their notes and upcoming slides while presenting.
In conclusion, mastering the use of PowerPoint on a Mac can be a game-changer for anyone looking to create impactful and persuasive presentations. Whether you’re a student, educator, entrepreneur, or professional, the ability to present your ideas clearly and attractively is invaluable.
So, dive in, explore the features, and harness the power of PowerPoint on your Mac to captivate your audience. Remember, a well-crafted presentation can be the key to success. Happy presenting!

Matthew Burleigh has been writing tech tutorials since 2008. His writing has appeared on dozens of different websites and been read over 50 million times.
After receiving his Bachelor’s and Master’s degrees in Computer Science he spent several years working in IT management for small businesses. However, he now works full time writing content online and creating websites.
His main writing topics include iPhones, Microsoft Office, Google Apps, Android, and Photoshop, but he has also written about many other tech topics as well.
Read his full bio here.
Share this:
Join our free newsletter.
Featured guides and deals
You may opt out at any time. Read our Privacy Policy
Related posts:
- Can I Convert My Powerpoint to Google Slides?
- How to Save Powerpoint as PDF with Notes
- How to Drag Slides From One PowerPoint to Another: A Step-by-Step Guide
- How to Make a Powerpoint Slide Vertical in Powerpoint 2013
- How to Set Time for Slides in Powerpoint
- What Are Benefits of PowerPoint? A Comprehensive Guide
- How to Combine PowerPoint Presentations With Different Orientations
- How to Check Word Count on Powerpoint 2010
- How to Insert Slides from Another Presentation in Powerpoint 2010
- How to Change Hyperlink Color in Powerpoint 2010 (An Easy 5 Step Guide)
- How Is Microsoft PowerPoint Used in Business: A Comprehensive Guide
- How to Unhide a Slide in Powerpoint 2013
- How to Convert a PowerPoint to Word and Edit with Ease
- How to Loop a Slideshow on Powerpoint 2013
- How to: Effortlessly Create PowerPoint Looping Presentations
- How to Change the Font on All Slides in Google Slides
- How to Change Line Spacing in Powerpoint for Every Slide at Once
- How to Insert Check Mark in Powerpoint for Office 365
- How to Start PowerPoint: A Step-by-Step Guide for Beginners
- How to Email a PowerPoint Slideshow: A Step-by-Step Guide
How to Make a PowerPoint on Mac? (A Step-by-Step Guide)
If you’ve ever wanted to create a professional-level PowerPoint on your Mac, you’re in luck! In this step-by-step guide, we’ll walk you through the entire process from start to finish.
You’ll learn what Keynote is and how to open it on your Mac, how to create a PowerPoint, customize the slides, add text, images, and media, utilize themes and animations, and finally, save and share your PowerPoint.
By the end of this guide, you’ll be a PowerPoint pro on your Mac!
Table of Contents
Short Answer
Making a PowerPoint on a Mac is easy.
First, open up the Pages application on your Mac.
Then, select the File menu and choose New from Template.
From there, you can select a PowerPoint template and customize it to fit your needs.
When you are finished, you can save your presentation and share it with others.
What is Keynote?
Keynote is a presentation software program developed by Apple Inc.
and is available on all Mac computers.
It is a powerful program that allows users to easily create engaging and professional presentations.
Keynote provides users with a wide range of tools and features, including customizable slides, themes, animations, and more.
With Keynote, users can create stunning presentations in minutes.
It is a great tool for creating presentations for business, education, and personal projects.
Keynote is easy to use and is a great choice for anyone who wants to make a professional-looking PowerPoint on a Mac computer.
How to Open Keynote on Mac
Opening the Keynote app on a Mac computer is quite simple.
To open the app, you can either use the “Finder” app in your Applications folder, or you can use the “Spotlight Search” tool to quickly find the Keynote app.
If you choose to use the Finder, simply open the Finder app and navigate to the Applications folder.
From there, you will find the Keynote app.
You can then double-click on the Keynote icon to open the app.
Alternatively, you can use the Spotlight Search tool to quickly locate the Keynote app.
To do this, click on the magnifying glass icon in the top-right corner of your screen.
You can then type in “Keynote” in the search bar and hit the “Enter” key.
The Keynote app should appear in the search results.
You can then click on the Keynote icon to open the app.
Once the Keynote app is open, you can begin creating your PowerPoint presentation.
You can customize your slides by adding text, images, and other media.
You can further customize your slides by using various themes and animations.
Once you have created your presentation, you can save it as a .pptx file and share it with others.
With the Keynote app, you can easily create a professional-looking PowerPoint on a Mac computer.
Creating a PowerPoint on a Mac
Creating a PowerPoint presentation on a Mac computer is a straightforward process, whether youre creating a presentation for work or school.
The first step is to open the Keynote app on the computer.
Keynote is the presentation software for Mac computers, and it makes creating a presentation simple and easy.
Once you have opened the Keynote app, you can begin customizing your presentation.
You can add text, images, and other media to your slides, as well as utilize various themes and animations to make your presentation look professional and eye-catching.
You can also customize the layout of your slides, allowing you to add different elements and adjust their placement.
When your presentation is complete, you can save it as a .pptx file and share it with your colleagues, classmates, or anyone else who needs to view it.
You can also export your presentation as a PDF, a movie file, an HTML file, or a JPG file, depending on your needs.
With the Keynote app, creating a professional-looking PowerPoint on a Mac computer is easy and stress-free.
All you need to do is open the app, customize your slides, and then save your presentation in the desired format.
Whether youre creating a presentation for work or school, the Keynote app will help you get the job done quickly and efficiently.
Customizing the Slides
Customizing the slides is an important part of creating a stunning PowerPoint presentation on a Mac.
The Keynote app provides a variety of tools and features to help you design your slides.
You can easily add text, images, and other media to customize your slides.
To add text to your slides, simply select the text box and type in your desired text.
To add images, you can either drag and drop them into the slide or use the Insert Image button.
You can also insert shapes, charts, and other media to customize your slides.
Additionally, Keynote offers a range of themes and animations to help you further customize your presentation.
Themes allow you to quickly change the overall look and feel of your slides.
Animations can be used to add a touch of flair to your slides, such as transitions between slides and animated text.
To access the themes and animations, simply click on the Themes or Animations tabs in the upper right-hand corner of the app.
By taking advantage of the Keynote apps customization features, you can easily create a professional-looking PowerPoint on a Mac computer.
With just a few clicks, you can customize your slides and make them look stunning.
So, if youre looking to create an impressive presentation, the Keynote app is the perfect tool for the job.
Adding Text, Images, and Media
When it comes to creating a professional-looking PowerPoint on a Mac computer, adding text, images, and other media is key.
With the Keynote app, you can easily customize your slides by adding text, images, and other media elements.
To add text, select the text box icon from the top menu, and then type in the text you want to include in the text box.
You can also adjust the font type, font size, font color, and other text properties.
Once you have finished editing the text, click the Done button to save your changes.
To add images, click the Add Image icon from the top menu, and then select an image from your computer, or add an image from the web.
You can also adjust the size, position, and transparency of the image to make it look more professional.
Finally, you can add other media elements such as audio and video to your slides.
To do this, click the Add Audio or Add Video icon from the top menu, and then select the audio or video file you want to include.
You can also adjust the size, position, and playback settings of the media element to make it look more professional.
By using these methods, you can easily add text, images, and other media elements to your PowerPoint slides on a Mac computer.
Once you have added all the elements, you can save your presentation as a .pptx file and share it with others.
Utilizing Themes and Animations
Creating a PowerPoint presentation on a Mac computer is made easier with the help of the Keynote app.
Not only can you easily create a professional-looking presentation, but you can also customize your slides with various themes and animations.
With the help of themes and animations, you can create a presentation that is visually appealing and engaging.
When creating a presentation, you can choose from a wide variety of themes and animations.
You can choose from a variety of colors, fonts, and designs to give your presentation a unique look.
You can also choose from several animation styles to give your presentation a more dynamic feel.
For example, you can choose to have your slides transition in with a fade or a slide, or you can animate specific objects within your slides.
Themes and animations can also help to emphasize certain points in your presentation.
For instance, you can use animations to draw attention to a particular slide or element in your presentation.
Additionally, you can use themes to create a professional and consistent look throughout your presentation.
Creating a presentation with themes and animations is easy.
In the Keynote app, simply select the themes tab to access the available themes and animations.
From there, you can customize your slides with the desired theme and animations.
You can also preview your slides and animations before you save them.
Creating a professional-looking and engaging presentation on a Mac computer is easy with the help of the Keynote app.
With the help of themes and animations, you can create a presentation that is visually appealing and will help to emphasize certain points you want to make.
With a few clicks, you can quickly create a presentation that will be sure to impress.
Saving and Sharing Your PowerPoint
Once you have finished creating your PowerPoint presentation, you can save it as a .pptx file and share it with others.
To save your PowerPoint, click the File menu at the top of the Keynote window and then click Save.
You will be given the option to save your file to your Macs hard drive or to the cloud.
If you wish to share your presentation with others, you can do so by exporting it as a PDF file or by sharing it directly with other users.
To export your presentation to a PDF file, click the File menu and then select Export.
You will be given the option to export your PowerPoint as a PDF file.
If you would like to share your presentation directly with other users, you can do so by clicking the Share menu at the top of the Keynote window and selecting Share with Others.
Here, you can enter the email addresses of the people you would like to share your presentation with.
You can also set a password for your shared presentation if you wish.
Once you have saved and/or shared your presentation, you can open it up again at any time by double-clicking on the .pptx file.
This will open up the presentation in the Keynote app and you can make any changes that you wish.
With the Keynote app, creating a professional-looking PowerPoint on a Mac computer is easy and convenient.
The steps outlined above will help you create a great presentation and save/share it with others in no time.
Final Thoughts
Creating a professional-looking PowerPoint on a Mac computer doesn’t have to be difficult.
With the help of the Keynote app, you can easily create slides with text, images, and other media, and customize your slides with themes and animations.
Now that you know how to make a PowerPoint on Mac, you’re ready to create your own presentations and share them with others.
So get to it and start making your own PowerPoint today!
James Wilson
James Wilson has extensive knowledge in the information technology industry.His second love, besides dealing with computers, is smart home technology. He is continually updating information to better comprehend this problem and has a deep understanding of the apartment’s support system.
Recent Posts
How to Use Airtable Automations? Master Workflow Efficiency with These Tips
To use Airtable automations, start by creating a base with the desired tables and fields. Then, navigate to the "Automations" tab and click on "Create an automation." Choose a trigger (such as a new...
Can You Do Conditional Formatting in Airtable? (A Comprehensive Guide)
Yes, you can definitely do conditional formatting in Airtable. Conditional formatting allows you to automatically format cells based on specific criteria. To set up conditional formatting in...
PowerPoint for Mac: Best tips for a successful presentation
- 0 Shares Share

The maxim of “Death by PowerPoint” does not fit in today’s tech-savvy era. Numerous startups and corporates pitch their ideas to their clients through presentations every day. They leverage stunning templates to design them and sweep their stakeholders off their feet. Slideshows hold an enormous audio-visual appeal that helps you to hook your audience throughout.
Whether it is Keynote or PowerPoint, showcasing a slideshow on your Mac must appear seamless. Be it slide layout, design, visuals, or overall aesthetics, a collection of well-thought, pixel-perfect slides is the key to presentation success. So, how to craft splendid and eye-catching Mac presentations? This article will enlighten you perfectly. Let us begin!
Here are seven best tips for creating successful and compelling presentations on your Mac:
Minimalistic slides
Gone are the times when people assumed that designing a ppt meant overloading it with information. You’ll be doing your audience a huge favor if you opt for minimalism in your slide content. Often presenters overload the slides unnecessarily and thus, end up overwhelming the audience. Embed your decks with one topic per slide. Ensure that you build your pitch decks with less text and more graphics. Keeping the slide content simple and precise will bestow your MAC slideshow with a decluttered look. It will help you to further your brand aesthetics as well.
You may consider following the famous 10-20-30 rule of PowerPoint presentations. The rule states that your presentation should be no longer than ten slides. It must not take beyond 20 minutes to deliver the entire presentation. And at last, the slides should feature a font size of at least 30 px. The revolutionary 10-20-30 rule helps you keep your slides minimalistic, deliver a captivating presentation and engage with the audience like never before.
Engaging multimedia
Humans have a limited attention span. Keeping this in mind, you must always integrate enchanting visuals to liven up your presentation. Employ vector images, 1080p videos, infographics, and GIFs to render the slides attractive. The truth is, no one likes to read raw data right off the slides! As a presenter, you should consider transforming raw data into engaging visuals that bind the interest of the audience to the presentation.
The incorporation of audio and other media forms assists you with a seamless slideshow. You can infuse your slides with visuals corresponding to your presentation topic. It will work as a double-edged sword. First, it will garner your slides appealing. Second, it will reinforce the textual content in your audience’s minds as well. Hence, slides without dedicated multimedia contribute to the phenomenon ‘Death By PowerPoint’.
Top-notch templates
Breaking the monotony of stock templates in your Mac is essential to stay a step ahead of your competitors. Utilizing age-old templates will not impress your clients as effectively as you desire. There is a high chance that your audience is already familiar with the stock template from some other presentation. Hence, the wow factor goes for a toss!
Well, you can leverage ready-to-use PowerPoint templates from SlideModel that offer 100% customization, superior graphics, and pixel-perfect design. Users can utilize the avant-garde slide templates to boost their presentation goals. The goal here is to woo the audience with your presentations’ design! Gorgeous graphics and tailor-made slide content will save your precious time from making a presentation from scratch. This business Pitch Deck PowerPoint Template is a boon for all entrepreneurs to construct wow-worthy pitches.
Elegant color-palette
An excellent way to highlight the key points of your Mac slideshow is to create a color contrast on the slides. You can design your slides in relevance to your brand colors or choose a vibrant color scheme. A golden tip here is to blend your presentation with high-contrast colors. It will aid you and your audience in capturing the slide essence. Place the dark-toned text with a light-toned background and light-colored slide content on a dark background. It will bring out the effect of aesthetic contrast.
A great tip here is embedding your presentation with your brand colors for making it impressive beyond measure. Choose only two to three colors throughout to maintain an equilibrium. One should try not to use all the contrast colors to attract the audience. Design consistency in your slides is a key to presentation success. Rather than overwhelming the audience with different high-contrast, mismatching colors, try to include a couple of color schemes and palettes across your presentation.
Captivating data visuals
Whether you’re presenting to an assembly of investors, pitching to a client, or presenting a company’s quarterly results, always back your data with rich visuals. Rather than reading random numbers from the slides, you should introduce a wow factor to your slides by leveraging state-of-the-art data visualizations. Render your PowerPoint presentations on Mac an awe-inspiring look with data visuals such as 3D charts, diagrams, infographics & graphs.
Display your research and statistics with mind-blowing data visuals. Employ alluring charts, tables, diagrams, trend lines, shapes, and infographics. You can color-code them to show comparisons and differences. Choose data visuals for bullets to leave an indelible mark on your audience. Projecting data with these tools helps your clients to retain information and comprehend it as well. SlideModel offers innumerable templates with exemplary data visuals for influencing the audience.

Hierarchical structure
Many people do not know the fact that information displayed first captures the attention of your audience before others. Thus, visual hierarchy is a way to organize your slide content based on its importance. Every presentation is intended to initiate a call-to-action amidst the audience. Presenters can reinforce the critical subject content through rich hierarchical structures. Prioritize placing the slide content in a manner that you want your clients to see initially.
Recognize the slide elements in the order of their significance and place them accordingly. Use good contrast placements, bolder texts, and large visuals. This way, your stakeholders will view your highlighted information first and then move to the other content. Hence, with your presentations, be it remote or in-person, you can encourage your audience to close the deal with you rather than missing the opportunity.
Master the typography
Every slideshow looks tidy when crafted with good typography. Apply corporate-grade typography fonts such as Helvetica instead of unprofessional or artistic Comic Sans. It assists in keeping easy readability for your slide content, plus helps in boosting the integrity of the content. Remember to place the size of your fonts as 30 px or more for your audience in the back as well. You won’t want your audience to squint their eyes while seeing your ppt.
As a presenter, you should always take care of the content length. One should avoid typing hefty paragraphs. Instead, go for one-liners and bullets. You may use six bullet points in each slide. Another great tip is to position the title of your slide to a slightly bigger font than the text. While presenting, you can further elongate the one-liners and help your audience understand the crux of the subject matter without throwing them off the track.
Mac PowerPoint presentations having a beautiful style can result in having a colossal effect on your audience. A well-crafted PowerPoint presentation can be a deciding factor between a closed deal and a missed opportunity.
Keep these seven enlightening and professional tips in your mind before structuring your next ideal presentation. Integrate a pinch of style, creativity, and vigor in your slide deck to create modernistic slides. The key is to attract your audience with minimalistic, yet engaging slide content.

News content on AppleMagazine.com is produced by our editorial team and complements more in-depth editorials which you’ll find as part of our weekly publication. AppleMagazine.com provides a comprehensive daily reading experience, offering a wide view of the consumer technology landscape to ensure you're always in the know. Check back every weekday for more.
Editorial Team | Masthead – AppleMagazine Digital Publication
- @http://twitter.com/applemagazine
- Follow me on Facebook
- Send me an email!
Related Stories
Can apple become a console gaming giant, apple rolls out new features for iwork suite across mac, ipad, and iphone, the lowdown on applecare+ (is it worth buying), demystifying apple pay: your ultimate guide, security features that keep your apple devices safe, apple set to discontinue ‘my photo stream’ service in july 2023, end of an era: apple infinite loop store shuts down, apple unveils ‘vision pro’ headset & visionos, why apple devices are better for media production, apple showcases ‘scary fast’ event filming techniques with iphone 15 pro max, you may also like.

Can HEIC Really Dethrone JPEG, or Is It Just Hype?

Getting Ready for Valorant Mobile: Helpful Tips for Beginners

Apple Pay: How Apple Is Shaping the Future of Digital Wallets

Understanding the Purpose of a Special Limited Partnership

Apple Tools for Students Enhancing Learning & Study Efficiency

Maximizing Efficiency: Integrating Virtual Receptionists with Your Existing Systems
- Editor's Choice: Tech Gifts for Mom
- Apple Event: What to Expect
How to Get PowerPoint on a Mac
Get the widely used presentation tool
:max_bytes(150000):strip_icc():format(webp)/SamCostello-d7fcf106ec2048ccb06d1e2190b3396d.jpg "how to do a presentation on mac")
- Ithaca College
:max_bytes(150000):strip_icc():format(webp)/ryanperiansquare-de5f69cde760457facb17deac949263e-180a645bf10845498a859fbbcda36d46.jpg "how to do a presentation on mac")
- Western Governors University
What to Know
- From the Mac App Store: Apple Menu > App Store > search for PowerPoint > Get > Install > enter Apple ID if prompted > Open .
- PowerPoint requires a subscription from Microsoft. You can sign up via In-App Purchase or at the Microsoft website.
- Keynote, Apple's alternative to PowerPoint, comes pre-installed on new Macs (and can be downloaded from the Mac App Store).
This article explains how to get PowerPoint on Mac, its requirements—including a subscription—and some free alternatives available on the Mac.
How Do I Get PowerPoint on Mac?
Getting PowerPoint on your Mac is very easy. Just a few clicks, and you'll be ready to start making slides and building presentations. Here's what to do:
Open the Mac App Store by going to the Apple menu > App Store or the Applications folder > App Store .
You can also download PowerPoint directly from Microsoft , but these instructions focus on the Mac App Store.
Search for PowerPoint .
On the search results screen, click Get .
Click Install .
Enter your Apple ID password when prompted.
When the download is finished, click Open to launch PowerPoint.
Once you've opened PowerPoint, you'll need to sign into your Microsoft account or use a free trial.
Is PowerPoint Free for the Mac?
PowerPoint is not free on the Mac (or on Windows, for that matter). Microsoft offers a free, 30-day trial after you download PowerPoint. Once the free trial expires, you need to pay to keep using the app. Options include a one-time purchase price or a monthly or annual subscription , which provides cloud storage features and ongoing technical support. You can subscribe through Microsoft's website or use in-app purchases via your Apple ID.
Do Macs Come With PowerPoint?
No. To get PowerPoint on your Mac, you need to download and install it using the steps from the first section of this article (or, as noted before, directly from Microsoft).
What Is the Mac Version of PowerPoint?
While PowerPoint may be the most well-known program for making slides and creating presentations, it's far from the only one. Your Mac probably came with one of the alternatives pre-installed.
Apple makes a program called Keynote which is a direct competitor to PowerPoint. It offers all of the core features of PowerPoint—creating slides and presentations, animations, templates, presenter mode, etc. It integrates tightly with Apple's other software and services like iCloud.
Keynote comes pre-installed for free on all modern Macs. It's likely in your Applications folder as you read this. If it's not, and if your Mac and version of the macOS are compatible with it, you can download it for free from the Mac App Store by searching for "Keynote."
Need to make slides and want to avoid both PowerPoint and Keynote? There are many other PowerPoint alternatives , but one place to start is Google Slides , which is free, web-based, and integrates with your Google account and other Google productivity tools.
To print PowerPoint slides with Notes on a Mac, open your presentation and select Print . In the Print dialog box, select Show Details . In the Layout box, select Notes . Configure the rest of your printing options and select Print .
The easiest way to record a voiceover in PowerPoint on a Mac is to record by slide. Select the slide where you want to add the narration, then select Insert from the menu bar and click Audio > Record Audio . Enter a name for the narration, select Record , read your script, and select Stop when you're finished recording.
To convert PowerPoint to video on a Mac, open the presentation you want to save and select File > Export . In the export window, next to File Format , select a file format option, such as MP4 or MOV . Choose your video quality, choose whether you want to include narrations, adjust timing, and select Export .
Get the Latest Tech News Delivered Every Day
- How to Use Copilot in Powerpoint
- How to Install Mac OS on PC
- The Best Free Productivity Apps for the iPad
- 4 Ways of Transferring Files From Android to Mac
- How to Use WhatsApp on a Mac
- The 10 Best Word Processing Apps for iPad in 2024
- How to Use Microsoft's Free PowerPoint Viewers
- The 20 Best Mac Apps of 2024
- What Is Microsoft PowerPoint and How Do I Use It?
- What Is Microsoft Word for Mac?
- How to Transfer Files Between an iPhone and a Mac
- How to Convert PowerPoint to Video
- How to Update PowerPoint on Windows and Mac
- What Is an Animation in Presentation Software?
- How to Fix 'Cannot Be Opened Because the Developer Cannot be Verified' Error on Mac
- How to Make a Poster in PowerPoint
- Apple Pencil
- Apple Watch
- All Smart TVs
In This Article
15 software used for mac presentation, 6 online presentation software for mac, does mac have presentation software, how do you create a presentation on mac, is there a mac version of powerpoint, is powerpoint better than keynote, let your presentation talk, related articles, 15 best presentation software for mac [reviewed & ranked].
Follow on Twitter
Updated on: February 08, 2024
Presentations are integral to any design: how else would you explain your idea to your client or team? People tend to leave presentations as the last possible step of their process and don’t give them as much time and attention as they need.

If you are a designer, architect, artist, businessman, or any other person that regularly makes subpar presentations, take your game to the next level with some of the best presentation software for mac !
You don’t want to download or install any App? Then check these 6 online presentation software for mac .
Here is some of the best presentation software for Mac that you can use to make your ideas and design extraordinary:

Price: Free Best for: Mac users
Keynote is one of the top presentation software for Mac and comes included with most Apple devices.
With its stunning features and powerful tools, you can bring your slides to life and create the most effective presentations for your clients or your boss.
- Best in-built presentation software for Mac
- Simple and intuitive
- Poor compatibility with windows presentation software
- Presentations can take too much storage
- Does not have as many editing tools as PowerPoint
2. FlowVella

Price: Free (limited version) or $10/month Best for: Mac users
This presentation software is excellent to combine words, images, videos, links, PDFs, and other media into a presentation.
This way, having an interactive presentation is easy.
It’s oriented towards marketing, HR professionals, and sales teams.
- Great Drag & Drop Feature
- Dozens of free templates
- You have to buy the software to use all the features and tools
3. Prezi for Mac

Price: Free (limited version) or starting at $10/month Best for: Mac users
Prezi for Mac is another great Mac presentation software that lets you create dynamic presentations. It has a trial version of 14 days.
The bad thing about making presentations is choosing a video or image to put into it. But not with Prezi.
Prezi is a leader in the video presentation movement and allows you to make the most interactive slides for your presentation.
- Great User Interface
- Zoom and overview feature
- Integration with Zoom Software
- It takes time and practice to learn how to work on Prezi.
- Not easy for beginners.

Price: Starting at $35 Best for: Mac users
Deckset is a unique presentation software that lets you put your ideas and thoughts into it and makes the slides for you.
This is great for people that want to spend less time and energy making slides for their presentation but is only for text-based presentations.
It includes a trial version to try before purchasing the complete presentation software.
- It designs your slides for you, taking off most of the pressure of creating a presentation
- Trial Version
- It is a very costly software to buy
5. PowerPoint

Price: Free (With a Microsoft 365 subscription) Best for: Mac users
PowerPoint for Mac is old but gold.
It is one of the oldest presentation software and allows you to create beautiful slides with multiple templates of your choice.
This software has many tools and features that make the presentation process fun and easy.
- Easy and simple to use
- Multiple free templates
- Lack of creativity in the included templates
- Display Compatibility issues
6. LibreOffice’s Impress

In this software for Mac, multiple editing and viewing modes make the process of editing and creating slides versatile and interactive.
This software is great for presentations that are mostly text-based.
- Free software
- It does not put a lot of strain on your system
- Not very good user interface
- Lack of integration with other presentation software
7. iSkySoft Slideshow Maker

Price: $59.95 Lifetime Best for: Mac users
iSkyDoft Slideshow Maker has to be one of the best presentation software for Mac.
It allows the user to add text, photos, and videos to the slides and music, which makes the entire experience of watching a presentation even better.
This presentation software can be used to beautifully commemorate an event, activity, design process, or team activity in one file.
Moreover, the software also has a ton of features and aftereffects that can be added to make the presentation even better.
- Easy-to-use interface with a ton of incredible features
- It has a steep subscription fee that might not be good for beginners or one-time users
8. Focusky 3D

Price: starting at $9.9 Best for: Mac users
If you want to make a presentation on your desktop but also want it to work on other devices, such as your phone or tablet, Focusky is the perfect software for you.
Focusky is a powerful 3D presentation software for Mac with a wide range of tools that allows you to customize your presentation according to your taste.
to customize your presentation according to your taste.
- It works great offline and doesn’t require any internet
- Powerful export functionality (slides into gift/flash)
- Unexciting slide visual effects
- It requires a bit of learning before you can successfully use it
9. TouchCast Pitch

TouchCast Pitch is one of the presentation software that you automatically gravitate towards when you want to make a meaningful, impactful, and interactive presentation.
Pitch turns boring presentations into winning experiences that make it hard to forget.
- It has a huge library of tools and interesting features for your use
- A bit hard to learn and teach students

If you’re trying to make a presentation in less time with the least effort and still hoping it will come out beautiful, Canva is the perfect software to use.
With its extensive features and tools, the software allows you to edit, customize, and create your slides for presentation in record time.
- It is free, simple, and has a good user interface.
- It allows you to create stunning designs in mere minutes
- It is not a specific software for presentations.
- It does not have as many interesting features as other presentation software

Price: Free or $8/month Best for: Mac users
If the presentations that Pitch lets you make are half as interactive and fun as their website, there is no better software for Mac to do presentations.
It has multiple great tools, effects, templates, and designs available for you to use for your presentation or get inspired to create your own.
- Team Collaboration feature
- Great Support Team
- It has a bit of a learning curve, especially for a beginner
- A limited selection of templates
12. WPS Office for Mac

Price: Free (limited version) or $ 25.21 / year Best for: Mac users
WPS Office must be the essential software on your desktop, whether it is Windows or Mac.
The WPS Office for Mac has all the features and tools that let you document your process and create some of the simplest and easiest presentations for your work meetings and project discussions.
- It allows for collaboration
- Easy documentation
- It doesn’t have a lot of tools for PDF editing or grammar-check for text
13. Premast Plus

Price: Free or $5.99/month Best for: Mac users
If you are a designer, or any other creative folk, looking for beautiful graphic presentation software, there is none better than Premast Plus.
It gives you a wide range of tools, templates, illustrations, and icons to use for your presentation to make it the best you can!
- Very simple
- Wide Range of rich templates
- A lot of the tools and features of this software are available only after you purchase a subscription
- A bit unstable.
14. Movavi Slideshow Maker

Price: Free Trial or $37 Best for: Mac users
Movavi Slideshow Maker is great for unconventional presentations as it lets you add images, videos, text, music, transitions, and effects to your file.
It allows you to create a movie out of your work, making the entire presentation fun and engaging.
- It has great and simple user-interface
- It lacks a lot of features and does not have the tools for professional editing and presentation-making
15. Propresenter – Church Presentations

Price: starting at $399 Best for: Mac users
Propresenter is a church presentation software for Mac that allows you to create a beautiful presentation for a sermon.
It can include worship lyrics, sermon notes, videos, images, etc., to create an impactful and powerful presentation.
The best thing about this software is that it is excellent for beginners.
- Perfect presentation software for church
- It has all the tools that you might need to add music, lyrics, sermon, and text.
- Very expensive software and only best for professionals
1. Slidesbean

Slidesbean is an innovative online presentation software for Mac that does most of the heavy lifting while making the presentation.
It has great features and interactive tools that offer everything you need to build the perfect pitch for your presentation!
Great for entrepreneurs who want to create a beautiful pitch deck.
- Great analytics
- The templates look great
- The result looks very professional
- Videos have to be uploaded to third-party platforms
- The AI feature is not too helpful
- Export for PowerPoint only exports as image
2. Renderforest

Looking for a great online presentation software for Mac that allows you to create stunning videos, animations, branding, mockups, presentations, and more?
Renderforest is the perfect site for beginners and professionals.
- High quality & professional looking templates
- Mind-blowing animations
- Video templates look great
- Free version available
- Limited customization
- Can be a bit pricy
- No iOS or Android app
- Video render time can take long
3. Zoho Show

The great thing about this online presentation software for Mac is that it allows for a group/team to collaborate on the process of creating a presentation.
It is a clean, simple, and easy software that makes creating presentations seamless and simple.
- Includes infographics
- Supports real-time collaboration
- It has good template designs
- It has a Chrome web browser extension that makes it easier to work on the slides.
- It allows broadcasting presentations
- Easy-to-use transitions
- Interface can be a bit slow on low-end devices
- Interface could be better
- No desktop App available

Visme is a fan favorite for brands, big and small, to create stunning presentations.
It has numerous templates and color pallets to choose from that make the entire process of making a presentation easy.
- Allows you to create a brand identity with “My brand” feature
- Disk capacity and usage limit can be low on basic and free plans
- No support for collaborators
- Learning curve
- Free version is way too limited
- The interface could be better
5. Google Slides

Google Slides is the most popular online presentation software that is used by millions worldwide.
It provides the basic tools and features necessary to create a striking presentation.
- Fast and easy to use
- Includes real-time collaborative mode
- It’s free
- Connected with Google services like Google Drive
- It doesn’t support non-Google-based fonts
- Limited templates
- Limited transitions and animations
- It won’t provide support for audio imports

Slides are one of the online presentation software that makes your presentation look extremely sleek and professional.
It is a must for all designers and project managers!
If you need to bring project management to the next level, then you must check out the best project management software for Mac .
- Supports custom HTML and CSS
- Supports two directions (vertical & horizontal)
- Smooth and fast interface
- Supports LaTeX
- It doesn’t provide templates
- It doesn’t support PowerPoint exports
Mac has a presentation software already preinstalled in all Apple devices called Keynote. It is completely free and it allows you to create stunning presentations for school projects, your business, your office, etc. It is available for Mac, iPhone, iPad, and even for PCs.
Keynote includes real-time collaboration with your team, which is an essential feature now that everything is done online.
You can create a presentation on Mac with the help of Keynote. To create a keynote presentation follow these 3 steps:
- Choose a theme.
- Add your content to the placeholder images and texts.
- Create a presentation from the slides.
Yes. Microsoft PowerPoint is available for download on Mac and your phone, tablet, or PC, but you would need a Microsoft 365 subscription on your device to use it on Mac. The software isn’t identical to the Windows one but is quite similar with only a few minor differences in menu and layout.
Where PowerPoint is the most common presentation software for everyone worldwide, Keynote has been declared a better presentation software for Mac users, especially for professionals.
But if you are looking for a variety of editing tools, features, and templates for your presentation, there is nothing that trumps PowerPoint.
Creating a powerful presentation is an essential part of your strategy, whether you are a businessman, a designer, an architect, or a project manager.
It would be best if you had a presentation that doesn’t bore your audience and manages to convey all the key information in the best possible way.
All the software mentioned above are some of the most extraordinary presentation software for Mac and can help you create a memorable presentation.
- How To Create A Page Like a PowerPoint Presentation
- 9+ Best Photo Management Software For Mac
- 13 Top Landspace Design Software For Mac
- 9 Best Database Software For Mac
- Top 19 Architect Software For Mac
Juwairiah Zia
Juwairiah Zia is a seasoned professional, a full stack developer and writer in her free time. She’s deeply immersed in various tech domains such as web and mobile application development and mentorship.
Don’t Miss…

- Legal Notice
- Terms & Conditions
- Privacy Policy
A project by Alvaro Trigo
Free All-in-One Office Suite with PDF Editor
Edit Word, Excel, and PPT for FREE.
Read, edit, and convert PDFs with the powerful PDF toolkit.
Microsoft-like interface, easy to use.
Windows • MacOS • Linux • iOS • Android

- Articles of PPT
How to Use PowerPoint on Mac (Step-By-Step Guide)
PowerPoint is an indispensable tool for creating, editing, and formatting slides. It is widely used for work, study, and personal projects. However, not everyone knows how to download and use PowerPoint on Mac OS. This article will walk you through the steps of downloading and using PowerPoint on a Mac and two other free and built-in presentation editors: WPS Presentation and Keynote.
Why Do You Need PowerPoint on a Mac?
PowerPoint is a presentation software that allows you to create and deliver engaging presentations. It offers various features, including adding text, images, videos, charts, and graphs to your slides. You can also customize the look and feel of your presentations using themes, templates, and fonts.

What is PowerPoint used for?
PowerPoint is used for a variety of purposes, including:
Business presentations: PowerPoint is commonly used to deliver business presentations to clients, colleagues, and investors.
Educational presentations: PowerPoint is also used to create educational presentations for students of all ages.
Personal presentations: PowerPoint can also be used to create personal presentations, such as wedding slideshows and travel photo presentations.
Alternatives to Microsoft PowerPoint
While PowerPoint is the most popular presentation software, there are several other alternatives available, including:
WPS Presentation: WPS Presentation is a free and open-source presentation editor that is compatible with PowerPoint files.
Keynote: Keynote is a built-in presentation editor for Mac users. It offers a variety of features, including templates, themes, and transitions.
How to download WPS Presentation on Mac?
WPS Presentation is a free presentation app for Mac offered by WPS Office. With a streamlined interface and handy tools, it makes an excellent PowerPoint alternative.

Users often choose WPS Presentation to create simple slide decks quickly. The drag-and-drop flexibility when inserting charts or arranging objects helps speed up their workflow.
WPS Presentation stands out with these key features:
Intuitive editing tools similar to PowerPoint
Thousands of free templates
Ability to export PPT and PPTX files
PDF converter and editor
Cloud sync and multi-device support
To download the WPS Presentation on your Mac:
Step 1: Go to https://www.wps.com/download/
Step 2: Click on the Free Download button in WPS Office for Mac box

Step 3: Indicate the download location and click Save.

Step 4: Double-click the “.zip” installer file to extract WPS Office Installer once the download completes.

Step 5: Open WPS Office Installer, then click Open.

Step 6: Click Install Now, then follow the instructions on installing WPS Office and related apps like Presentation.

After installation, you can find WPS Presentation conveniently in your Applications folder or Launchpad. Its clean interface will be familiar to PowerPoint users, with menus for Home, Insert, Design, Transitions, and more.

How to download Microsoft PowerPoint on Mac?
Here is a step-by-step walkthrough with pictures on how to download PowerPoint for Mac using the App Store:
Step 1 : Open the App Store on your Mac.

Step 2: In the search bar at the top right, type in "PowerPoint" and press Return.

Step 3: The Microsoft PowerPoint app should appear as the first result. Click on the Get button and then Install.

Step 4: You'll see a progress bar as PowerPoint downloads. After it finishes, you'll find it in your Applications folder.

Step 5: Open PowerPoint and sign in with your Microsoft account or create a new free account to use it.

After opening PowerPoint, you can pick from a wide selection of templates to create your first presentation!
How to Use the Built-in Mac Keynote?
Mac users can also access the powerful Keynote app built into Apple's iWork suite. With its intuitive interface and gorgeous themes, Keynote makes creating beautiful slides on a Mac easy.

Image’s link: https://www.thegioididong.com/hoi-dap/keynote-la-gi-cach-su-dung-keynote-tren-iphone-macbook-chi-1359032
I like using Keynote when I want to assemble visually impressive presentations quickly. The animated builds and transitions between slides keep audiences engaged.
Standout features of Keynote:
Pre-built themes with elegant animations
Drag-and-drop image/chart insertion
Tools for flowcharts, diagrams, and shapes
Record presenter narration and timings
Easy sharing via iCloud or Apple TV
Steps to create and edit a new slide in Keynote:
Follow these steps to begin a new presentation in Keynote:
Step 1: Open Keynote from your Applications folder or Launchpad.

Step 2: Click New Document to access the Keynote homepage.

Step 3: Double-click the desired slide layout to insert a new one.

Step 4: Customize the slide by adding a title, text, images, and other media.

Step 5: To add more slides, click Add Slide.

Step 6: Click the Play button in the top toolbar to present the slides

With just a few clicks, you can create amazing-looking presentations through Keynote's simplicity and built-in Apple polish.
Practical Tips for Using Keynote on Mac
To add a slide transition effect, select the slide from the slide navigator on the left, then click on the Animate tab in the window's top-right corner. Choose the Action option and click on the Add an Effect button. You can select from over a dozen effects and customize their duration, direction, and start time.

To animate individual objects on the slides, select the objects and go to Animate > Build In > Add an Effect. You can preview the effect and change its order, timing, and delivery. You can also use the Build Out option to animate how objects disappear from the slides.
To use Magic Move, duplicate a slide and change the position of the objects on both slides. Then select the first slide and choose Magic Move from the Add an Effect menu. Keynote will automatically create a smooth animation between the two slides. You can adjust the duration and other options as well.

To edit your slide layouts, go to View > Edit Slide Layouts. You can add, delete, or modify any slide layout to suit your needs. You can also change your presentation's theme, background, and color scheme.

To customize your toolbar, go to View > Customize Toolbar. You can drag and drop any tool you want to add or remove from the toolbar. You can also choose between icon-only, text-only, or icon-and-text modes.

To use action buttons for shapes in Keynote, select a shape and go to Format > Add Link > Slide. You can choose which slide to link to or use the Next Slide or Previous Slide options. This way, you can create interactive presentations that let you jump around different slides with a click.

To access a variety of chart styles, simply click the Chart button on the toolbar or navigate to Insert > Chart in the menu bar. You'll find a wide range of styles, including 2D, 3D, and Interactive options.

What are the Differences between PowerPoint on Mac and PowerPoint on Windows?
While PowerPoint on Mac retains most core features from the Windows version, there are some critical differences in how specific tools work:
The user interface follows Mac design language instead of the Windows ribbon
Animations and transitions have fewer effects options on Mac
Saving as older PPT formats may cause formatting changes
Linked media like charts can break when moving files cross-platform
Mac menus lack certain administration tools for managing templates
Some other limitations include:
Occasional font compatibility issues
Differences in default autocorrect/styling behavior
Variation in how slide masters/layouts are handled
Mac PPT files render slightly differently in Windows
However, the web-based PowerPoint for Office 365 helps mitigate most cross-platform issues. But keeping the above differences in mind can help avoid headaches when collaborating between Mac and PC.
Practical Skills for Using PowerPoint on Mac
To start mastering PowerPoint on your Mac, try out these handy tips:
Use keyboard shortcuts like Command + M to quickly add slides from the master view
Right-click on objects like charts to open formatting options
Hide slides rather than deleting them in case you need them again later
Use section breaks in the slide sorter view to divide related slides into groups
Align or distribute objects under the Format menu to cleanly organize elements
Adjust video playback quality under Playback to optimize performance
Enable Auto Save and Auto Recover to prevent data loss from unexpected shutdowns
Use Notes Page view to add detailed presenter notes to each slide
Click the Record Slide Show button to record timings and narration for the presentation
To deliver a presentation in PowerPoint on Mac, you can also use the keyboard shortcut Command + Shift + F5 to start a slide show.
With PowerPoint's robust set of features tailored for Mac, you can create and deliver polished presentations efficiently.
Use Word, Excel, and PPT for FREE, No Ads.
Edit PDF files with the powerful PDF toolkit.
Microsoft-like interface. Easy to learn. 100% Compatibility.
Boost your productivity with WPS's abundant free Word, Excel, PPT, and CV templates.
Can I use PowerPoint on Mac for free?
Yes, you can access PowerPoint for free on a Mac through the online Office web apps or via a 30-day trial of Microsoft 365.
Does PowerPoint work the same on Windows and Mac?
PowerPoint on Mac generally provides the same core features as the Windows version. However, minor differences may exist in how specific tools, effects, fonts, and media function when moving files cross-platform. For example, the ability to create macros is unavailable in PowerPoint on Mac.
Is PowerPoint Mac compatible with PPT files from Windows?
You can usually open PPT and PPTX files created on Windows in PowerPoint on Mac without issues. But occasionally, some advanced formatting, animations, or linked media may break when transferring the file.
What are some excellent alternatives to PowerPoint on Mac?
Some good alternatives to PowerPoint on Mac include WPS Presentation and Keynote. WPS Presentation is a free and open-source presentation editor that is compatible with PowerPoint files. Keynote is a built-in presentation editor for Mac users.
PowerPoint remains the top choice for creating professional presentations on both Windows and Mac. While the Mac version has a few limitations, it provides the full PowerPoint toolset tailored for Apple devices.
Whether you choose Microsoft PowerPoint, WPS Presentation, or Keynote, you now have the tools and knowledge to create compelling presentations. Start crafting your next masterpiece and leave a lasting impression on your audience.
- 1. How to Use Zoom PowerPoint Presenter View: A Step-by-Step Guide
- 2. How To Narrate a PowerPoint on Mac – A Comprehensive Guide
- 3. How to Export PowerPoint Notes to Word Mac (Step-by-Step Guide)
- 4. How to Export PowerPoint to Video on Mac (Step-by-Step)
- 5. How to Use a Master Slide in PowerPoint (Step-By-Step Guide)
- 6. How to Compress a Powerpoint on Mac A Comprehensive Guide

15 years of office industry experience, tech lover and copywriter. Follow me for product reviews, comparisons, and recommendations for new apps and software.
- Apple Watch
- Accessories
- Digital Magazine – Subscribe
- Digital Magazine – Info
- Smart Answers
- Let Loose iPad event
- New iPad Air
- iPad mini 7
- Best Mac antivirus
- Best Mac VPN
When you purchase through links in our articles, we may earn a small commission. This doesn't affect our editorial independence .
How to open Microsoft PowerPoint presentations in Apple Keynote on a Mac

If you use Microsoft PowerPoint on your Mac, you can save the presentations you create and open them in Keynote, Apple’s presentation app. It’s a handy feature to use in case you can’t access Microsoft’s apps.
Every Mac comes with Apple’s iWork apps: Pages (word processor), Numbers (spreadsheet), and Keynote (presentations). And these apps can import Office documents. Here’s how you can open Word documents in Pages, as well as export Pages documents for use in Word.
How to import Microsoft PowerPoint presentation into Apple Keynote
This procedure works with .pptx and .ppt file formats.
- Launch Keynote (it’s in the Applications folder of your Mac).

- A window may appear, explaining any changes that were made during the import process. The more complicate your PowerPoint presentation (formatting, fonts, images, etc.), the higher the possibility that a change had to be made. The simpler the document, the more your file will resemble what you created in PowerPoint.
- That’s it. The PowerPoint file should open in Keynote.
Before you start working on your presentation, look it over carefully. Formatting may have changed and you may have to fix it. There’s always a chance that so much happened during the import that you can’t use your presentation.
How to export Apple Keynote presentations as Microsoft PowerPoint documents
If you’ve been working in Pages and will eventually return to Word, you can export your document as a Word file. Here’s how.
- In Keynote, click on the File menu and move your cursor to “Export to”.

- Choose where you want to save the file and name it.
- When you click Export, this will save the file.
Author: Roman Loyola , Senior Editor

Roman has covered technology since the early 1990s. His career started at MacUser, and he's worked for MacAddict, Mac|Life, and TechTV.
Recent stories by Roman Loyola:
- Keynote, Numbers, and Pages jump to version 14–here’s what’s new
- Oracle warns: Java users should hold off on updating to macOS Sonoma 14.4
- AI-enhanced Xcode rumored to lead Apple’s push into AI-boosted iOS, macOS
- PDFelement for Windows
- PDFelement for Mac
- PDFelement on Mac App Store
- PDF Reader for Windows
- PDFelement for iPhone/iPad
- Get from App Store
- PDFelement for Android
- Get from App Google Play
- PDF Scanner for iPhone
Cloud & SDK
- Document Cloud
- PDFelement Pro DC
- PDFelement SDK
Online PDF Tools
- PDF to Word
- Compress PDF
- Word to PDF
Educational Users
- Annotate PDF
- Combine PDF
Personal Users
- Convert PDF
- Organize PDF
Professional Users
- eSign PDFs Legally
- Extract Data from PDF
- Password Protect PDF
PDF Solutions for
- Chat with PDF
- AI PDF Summarizer
- AI PDF Translator
- AI Content Detector
- AI Rewrite PDF
- Proofread PDF
- Add Bookmarks to PDF
- Explain PDF
- Mac Software
- OCR PDF Tips
- Online PDF Tips
- Edit PDF like Word
- PDF Converter Tips
- PDF Compressor Tips
Why PDFelement
- Customer Stories
- PDF Software Comparison
- Contact Support
- PDFelement for iOS
- InstaScan for iPhone
Explore More
- Reviews See what our users say.
- Free PDF Templates Edit, print, and customize free templates.
- PDF Knowledge PDF-related information you need.
- Download Center Download the most powerful and simple PDF tools.
- Download Download Pricing Pricing
How to Make a PowerPoint on Mac OS 10.15 Catalina

Elise Williams
2024-04-30 11:04:23 • Filed to: PowerPoint Tips • Proven solutions
The software that can be used to create a presentation on Mac includes, PowerPoint and keynote among others. In this case, we are going to learn how to make a PowerPoint on mac . There are a number of ways to go by on making a presentation on Mac which includes using Microsoft PowerPoint for Mac, creating a presentation using keynote, or Google docs and export as PowerPoint file (ppt or .pptx).
How to Make a PowerPoint on Mac
In this article, we will use Keynote on Mac to make a presentation and then export it to PowerPoint.
Step 1. Launch Keynote
Click on the “Keynote icon in the Launchpad to open it. A window displaying various theme templates “Theme chooser” will appear. In the case it does not appear, click the option key and on the “File” menu select “new” to open a new presentation template.
Step 2. Choose the Theme of the Presentation
Scroll to navigate in the theme chooser and choose the type of presentation you want to make then double click on it to open.

Step 3. Change the Layout
To change to a different layout, you can click on the “Layout” button, and then select your desired layout.

Step 4. Add Content
There are a number of activities you might need to perfume on the presentation which involves adding your content.
- To add a slide, click on "Add Slide" in the toolbar and then select a layout.
- To add text, there is a placeholder text on the slide which you should double click and type to replace it with your own.
- To add an image, drag and drop or copy and paste an image to the slide from your computer or webpage.
Step 5. Save the File
After you are done with adding your content to the slide and your presentation is ready, you can click on "Save" and enter the file name. Meanwhile, you need to choose the location to save your file, and finally click “Save”.
Step 6. Export to PowerPoint
It is always important to try playing your presentation by yourself before you present it to other people to familiarize with it and make any necessary changes.
- Step 1. To export the file, you can click on “Share” on the menu, and then select “export”.
- Step 2. Click on "PPT" from the menu and then click “Next”.
- Step 3. Navigate to the location you want to save your file and change name if necessary.
- Step 4. Click on “export”. Last but not least, you can open the exported PowerPoint file to confirm the content.

The Best PDF Software for Mac
Wondershare PDFelement - PDF Editor is the best PDF editor which can be described as an All-in-One PDF Editor. It is attributed to powerful features that can edit PDF text and images, convert documents to various formats, and also create fillable forms, protect and share documents. It has become one of the commonly used and preferred document software owing to its advanced features, flexible prices, and perfect performance. PDFelement offers full control of your work on editing and modifying with its custom tools without forgetting its easy-to-use interface. The following are some popular features of PDFelement.
Launch PDFelement on your Mac computer, and click "Open File" and search for the file you want to open. Then you can choose the "Edit" option, and then you can add text, crop, watermark, change font or background, add page numbers among others.

• Convert PDF
Launch PDFelement on your Mac computer and import the PDF document to this program. And you can click the "File" > "Export To" option, then you select the format in which you want to convert the file like excel, word, and image, and finally click "Save".

• Create PDF Forms
Open your PDFlelement program and click on "File" > "Create", and then choose the "Blank Document" option.

Now click on "Form" on the left column, and pick one of the displayed elements and move the cursor to the blank area of the document to execute it.

After that, you can set the properties of the form by double-clicking on it to either align, modify, adjust size or delete. Once you have drawn your forms, you can type in your text content. To open the created fields, you can double click on it, and then you can also open the properties window to set either calculation, options, or appearances. Finally, you can click “Save” when you are done.

Free Download or Buy PDFelement right now!
Buy PDFelement right now!
chief Editor
Speak Your Mind
Related articles.
- How to Add Border in PowerPoint
- How to Add Page Numbers in PowerPoint
- Quicktime Not Available in PowerPoint? Solve It.
- How to Change Background in PowerPoint
- How to Create Video from PowerPoint
How to do a voiceover on a PowerPoint presentation and add pre-recorded audio to your slides
- You can record a voiceover in PowerPoint and insert it into your next presentation using the software's Audio recording feature through the Insert menu.
- Recording and inserting a voiceover into PowerPoint is a relatively similar process on an Apple Macbook and Windows PC.
- Once you've recorded your audio, you can click the microphone icon that appears on your slide and playback your recording.
- Visit Business Insider's Tech Reference library for more stories .
Public speaking is a valid and common fear. And although you might be trying to hone your public speaking with your free time at home , there's a way you can incorporate your voice into your next PowerPoint presentation without the pressure of speaking on the spot.
How? Microsoft PowerPoint has a feature that lets you create narration for all slides as you see fit. This way, you can record — and re-record — voiceovers for your presentations that won't make you cringe.
The process is virtually identical for both Mac and PC users and you can use your computer's built-in mic or a headset. Whatever your operating system of choice is, easily record narration over a PowerPoint slide in a few quick steps.
Check out the products mentioned in this article:
Microsoft office (from $149.99 at best buy), apple macbook pro (from $1,299.00 at apple), acer chromebook 15 (from $179.99 at walmart).
SteelSeries Arctis 1 Wireless Headset (From $92.49 at Amazon)
How to record a voiceover for PowerPoint on a PC
1. Open a new or existing or presentation in PowerPoint.
2. From the top toolbar, select "Insert."
3. Toward the far right side, click "Audio."
4. Choose "Record Audio…"
5. Name your audio file.
6. Click the circle icon when you're ready to start recording.
7. Select "OK" when you're done recording.
8. A microphone icon will indicate the narration has been added to the slide.
How to record a voiceover for PowerPoint on a Mac
1. Open a new or existing or presentation in PowerPoint for Mac.
2. Find and select "Insert" from the top toolbar.
4. Select "Record Audio…"
5. Name the audio file, and click the circle icon when you're ready to start recording.
6. Click "Insert" when you're ready to finalize.
7. You can click the microphone icon on the slide to hear your recording.
Related coverage from Tech Reference :
How to download and access microsoft powerpoint on your mac computer, how to add a border to slides in powerpoint, and give your slideshow a sleek design, how to change and format the background of your powerpoint slides to custom designs, how to change your language settings in microsoft powerpoint in 3 different ways, how to copy or duplicate a powerpoint slide and put it anywhere in your slideshow.
Insider Inc. receives a commission when you buy through our links.
Watch: Apple just launched a $6,000 Mac Pro, available this fall
- Main content
- Start the presentation and see your notes in Presenter view Article
- Add speaker notes to your slides Article
- Rehearse and time the delivery of a presentation Article
- Record a slide show with narration and slide timings Article
- Print your PowerPoint slides, handouts, or notes Article
- Create a self-running presentation Article

Record a slide show with narration and slide timings
You can record your PowerPoint presentation—or a single slide—and capture voice, ink gestures, and your video presence. When completed, it’s like any other presentation. You can play it for your audience in a Slide Show or you can save the presentation as a video file. So, instead of just “handing the deck” to someone, people can see your presentation with the passion and personality intact.
A new feature for Microsoft 365 was rolled out in early 2022. Exactly when your business has this feature is also based on when your admin distributes new features in Microsoft 365.
This article contains procedures for both the new experience and the classic experience:
New experience
Classic experience

All recording tools are in the Record tab in the ribbon, but you can start by selecting the Record button.

You can also record by selecting one of the options in the Record section of the Record tab.

If you have notes in your presentation, they’re turned into text at the top of the screen so you can use them like a teleprompter as you record.
Tip: Use the auto-scroll feature in teleprompter and set it to scroll at your preferred speed.

There are several options you can use when you record a presentation. You can turn your camera and microphone on or off by selecting the icons at the top. There are several options you can use when you record a presentation. You can turn your camera and microphone on or off by selecting the icons at the top. To change your camera or microphone, choose the Select more options <···> icon. You can even add a customizable camera that can be resized, repositioned, and formatted to go with your slide content. Select Edit , then select Cameo . Adjust the formatting for the camera, then select Record again to return to the recording environment.
In the Select the camera mode menu, you can select Show Background or Blur Background .

You can also change the layout in the Views menu to switch between Teleprompter , Presenter View , or Slide View .

When you’re ready, select Start recording and a countdown will begin.
Use the onscreen laser, colored pens, or highlighters in the tray below markup slides and it’ll record as well.
To record narration for a specific slide, use the previous or next arrows.
Note: Narration won’t record during slide transitions so let those play first before you start speaking.
Pause the recording as needed or select Stop if you’re done.
To review the video, select the Play button.
To quickly delete and re-record your video on current slide or on all slides, select Delete . While Clear will delete the recorded narration, Reset to Cameo additionally replaces the recorded narration with the camera feed for an easy retake.

When you’re done, select Export > Export Video .
After you successfully export the video, you can view the video by selecting View and share video .

At any time, you can return to your document by selecting the Edit button.
Want more?
About Record in PowerPoint
Create a self-running presentation
Export or turn your presentation into a video
Classic experience
Turn on the Recording tab of the ribbon: On the File tab of the ribbon, click Options . In the Options dialog box, click the Customize Ribbon tab on the left. Then, in the right-hand box that lists the available ribbon tabs, select the Recording check box. Click OK .

To get ready to record, select Record on either the Recording tab or the Slide Show tab of the ribbon.
Clicking the upper half of the button starts you on the current slide.
Clicking the lower half of the button gives you the option to start from the beginning or from the current slide.

(The Clear command deletes narrations or timings, so be careful when you use it. Clear is grayed out unless you have previously recorded some slides.)
The slide show opens in the Recording window (which looks similar to Presenter view), with buttons at the top left for starting, pausing, and stopping the recording. Click the round, red button (or press R on your keyboard) when you are ready to start the recording. A three-second countdown ensues, then the recording begins.

The current slide is shown in the main pane of the Recording window.
You can stop the recording any time by pressing Alt + S on your keyboard.
Navigation arrows on either side of the current slide allow you to move to the previous and next slides.
PowerPoint for Microsoft 365 automatically records the time you spend on each slide, including any Animate text or objects steps that occur, and the use of any triggers on each slide.
You can record audio or video narration as you run through your presentation. The buttons at the lower-right corner of the window allow you to toggle on or off the microphone, camera, and camera preview:

If you use the pen, highlighter, or eraser, PowerPoint records those actions for playback also.

If you re-record your narration (including audio and ink), PowerPoint erases your previously recorded narration (including audio and ink) before you start recording again on the same slide.
You can also re-record by going to Slide Show > Record .
You can pick a pointer tool (pen, eraser, or highlighter) from the array of tools just below the current slide. There are also color selection boxes for changing the color of the ink. ( Eraser is grayed out unless you have previously added ink to some slides.)
To end your recording, select the square Stop button (or press S on your keyboard).
When you finish recording your narration, a small picture appears in the lower-right corner of the recorded slides. The picture is an audio icon, or, if the web camera was on during the recording, a still image from the webcam.

The recorded slide show timing is automatically saved. (In Slide Sorter view, the timings are listed beneath each slide.)
In this process, what you record is embedded in each slide, and the recording can be played back in Slide Show. A video file is not created by this recording process. However, if you need one, you can save your presentation as a video with a few extra steps.
Preview the recorded slide show
On the Slide Show tab, click From Beginning or From Current Slide .
During playback, your animations, inking actions, audio and video will play in sync.

Preview the recorded sound
In the Recording window, the triangular Play button near the top left corner lets you preview the recording of the slide that currently has the focus in that window.

In Normal view, click the sound icon or picture in the lower-right corner of the slide, and then click Play . (When you preview individual audio in this way, you won't see recorded animation or inking.)

You can pause playback while previewing the audio.
Set the slide timings manually
PowerPoint for Microsoft 365 automatically records your slide timings when you add narrations, or you can manually set the slide timings to accompany your narrations.
In Normal view, click the slide that you want to set the timing for.
On the Transitions tab, in the Timing group, under Advance Slide , select the After check box, and then enter the number of seconds that you want the slide to appear on the screen. Repeat the process for each slide that you want to set the timing for.
If you want the next slide to appear either when you click the mouse or automatically after the number of seconds that you enter—whichever comes first—select both the On Mouse Click and the After check boxes.
You can use manual slide timings to the trim the end of a recorded slide segment. For example, if the end of a slide segment concludes with two seconds of unnecessary audio, simply set the timing for advancing to the next slide so that it happens before the unnecessary audio. That way you don't have to re-record the audio for that slide.
Delete timings or narration
The Clear command is for deleting timings or narration from your recording that you don't want or that you want to replace.
In the Recording window, the Clear command in the top margin of the window allows you to:
Clear recordings on the current slide
Clear recordings on all slides
In Normal view, there are four different Clear commands that allow you to:
Delete the timings on the currently selected slide
Delete the timings on all slides at once
Delete the narration on the currently selected slide
Delete the narration on all slides at once
If you do not want to delete all the timings or narration in your presentation, open a specific slide that has a timing or narration that you do want to delete.
On the Recording tab of the PowerPoint for Microsoft 365 ribbon, on the Record Slide Show button, click the down arrow, point to Clear , and then choose the appropriate Clear command for your situation.

Turn off timings or turn off narrations, and ink
After you've recorded your PowerPoint for Microsoft 365 presentation, any timings, gestures, and audio you performed are saved on the individual slides. But you can turn them all off if you want to view the slide show without them:
To turn off recorded slide timings: On the Slide Show tab, clear the Use Timings box.
To turn off recorded narrations and ink: On the Slide Show tab, clear the Play Narrations box.
Publish the recording to share it with others
Once you've edited the recording to your satisfaction, you can make it available to others by publishing to Microsoft Stream.
With the presentation open, on the Recording tab, select Publish to Stream .
Type a title and a description for the video.
Set other options, including whether you want others in your organization to have permission to see the video.
Select the Publish button.
The upload process can take several minutes, depending on the length of the video. A status bar at the bottom of the PowerPoint window tracks the progress, and PowerPoint shows a message when the upload is finished:

Click the message to go directly to the video playback page on Microsoft Stream.
Create closed captions
To make your video more accessible by including closed captions, choose from these options, which are described in separate Help articles:
Manually write a closed caption file yourself
Get a closed-caption file automatically generated by Microsoft Stream
Once you have a closed-caption file, you can add it to your video file by using PowerPoint .
Record a slide show
With your presentation open, on the Slide Show tab, click Record Slide Show .
(The Clear command deletes narrations or timings, so be careful when you use it. Clear is grayed out unless you have previously recorded some slides.)
In the Record Slide Show box, check or clear the boxes for your recording, and click Start Recording .

More about these options:
Slide and animation timings : PowerPoint automatically records the time you spend on each slide, including any animation steps that occur, and the use of any triggers on each slide.
Narrations, ink, and laser pointer: Record your voice as you run through your presentation. If you use the pen, highlighter, eraser, or laser pointer, PowerPoint records those for playback as well.
Important: Pen, highlighter, and eraser recording are available only if you have the February 16, 2015 update for PowerPoint 2013 or a later version of PowerPoint installed. In earlier versions of PowerPoint, pen and highlighter strokes are saved as ink annotation shapes.
At the top left corner of the window is the Recording toolbar, which you can use to:

If you re-record your narration (including audio, ink, and laser pointer), PowerPoint erases your previously recorded narration (including audio, ink, and laser pointer) when you start recording again on the same slide.
You can also re-record by going to Slide Show > Record Slide Show .
To use ink, eraser, or the laser pointer in your recording, right-click the slide, click Pointer options , and pick your tool:
Laser Pointer
Highlighter
Eraser (This option is grayed out unless you have previously added ink to some slides.)
To change the color of the ink, click Ink Color .
To end your recording, right-click the final slide, and click End Show .
Tip: When you finish recording your narration, a sound icon appears in the lower-right corner of each slide that has narration.
The recorded slide show timings are automatically saved. Timings are shown in Slide Sorter view just beneath each slide.
In this process, what you record is embedded in each slide, and the recording can be played back in Slide Show. A video file is not created by this recording process. However, if you want a video file, you can save your presentation as a video with a few extra steps.
On the Slide Show tab, click From Beginning or From Current Slide.
During playback, your animations, inking actions, laser pointer, audio and video play in sync.
Preview the recorded audio
In Normal view, click the sound icon in the lower-right corner of the slide, and then click Play.
PowerPoint automatically records your slide timings when you add narrations, or you can manually set the slide timings to accompany your narrations.
On the Transitions tab, in the Timing group, under Advance Slide , select the After check box, and then enter the number of seconds indicating how long the slide should appear on the screen. Repeat the process for each slide that you want to set the timing for.
Tip: If you want the next slide to appear either when you click the mouse or automatically after the number of seconds that you enter—whichever comes first—select both the On Mouse Click and the After check boxes.
The Clear command is for deleting timings or narration from your recording that you don't want or that you want to replace. There are four different Clear commands that allow you to:
On the Slide Show tab of the PowerPoint ribbon, on the Record Slide Show button, click the down arrow, point to Clear, and then choose the appropriate Clear command for your situation.
Turn off timings or turn off narrations, ink, and laser pointer
After you've recorded your PowerPoint presentation, any timings, gestures, and audio you performed are saved on the individual slides. But you can turn them all off if you want to view the slide show without them:
To turn off recorded narrations, ink, and the laser pointer: On the Slide Show tab, clear the Play Narrations box.
Turn your mouse into a laser pointer
Animate text or objects
Turn your presentation into a video
Create a self-running presentation
Record your presentation

Toggle video and audio options in the options dropdowns in the recording toolbar.

Note: Your video will be re-recorded just as you had styled.
After you exit Recording Studio with the Esc key (or by clicking End show ) you will see narration (audio/video) applied to your slide along with the proper slide timings and ink animations.
Tip: Audio, video, and inking elements can all be resized and moved in edit view after recording.

Reset to Cameo
To delete your recording and retain your camera style, do the following:
On the Record tab, select Reset to Cameo .

Clear timings or narration
On the Record tab, select Clear Recording

Keyboard shortcuts during the recording process
Related information.
Present with Cameo
Save a presentation as a movie file or MP4
Record audio in PowerPoint for Mac
Add or delete audio in your presentation
Prepare to record
To begin, open the presentation you want and click the Slide Show tab.
Tip: If your presentation has a lot of slides, you might find it more convenient to work in Slide Sorter view. Click View > Slide Sorter to try it out.
Here are some things to check before you begin recording:
If you want to record only part of your slide deck, do one of the following before you begin:
Select the slides you don't want to include, and click Hide Slide .
Click Custom Show > Custom Slide Show > + (add).

Use the Rehearse button to change the timing between slides without affecting the narration or gestures you've already recorded.

Make sure your microphone is set up correctly. On the Mac, go to System Preferences > Sound .
Record your slide show
If you want to add narration or commentary to the slide show, make sure your microphone is set up and working.
To start recording:
Click the Slide Show tab, select the slide where you want the recording to begin, and then click Record Slide Show .

During recording, use Ctrl+click to access the recording commands that let you navigate through the slides, change cursors, or trigger screen blackouts or whiteouts.

Click End Show to stop recording.
A Save dialog box appears. Click Yes to save your recording, or No if you want to record it again.
Saving overwrites anything you've previously recorded. If you want to record another slide show with the same set of slides, save your presentation file with a different name.
Click Play from Start to preview your recording.
You may want to print this list of keyboard shortcuts to refer to while you're recording:
Set playback options
When you've finished recording and are ready to distribute the presentation, click Set up Slide Show and choose the options that are right for your audience.

Show type Show full screen or windowed.
Show options Turn off narration or animations.
Slides Choose a subset of slides, or a Custom show if you've set one up.
Advance slides Set up this version of the slide show so someone can page through it manually.
Add, change, or remove transitions between slides
Start the presentation and see your notes in Presenter view
We're sorry. PowerPoint for the web doesn't support recording a slide show.

Need more help?
Want more options.
Explore subscription benefits, browse training courses, learn how to secure your device, and more.

Microsoft 365 subscription benefits

Microsoft 365 training

Microsoft security

Accessibility center
Communities help you ask and answer questions, give feedback, and hear from experts with rich knowledge.

Ask the Microsoft Community

Microsoft Tech Community

Windows Insiders
Microsoft 365 Insiders
Was this information helpful?
Thank you for your feedback.
Photos User Guide
- Get started
- Overview of importing
- Use iCloud Photos
- From a camera or phone
- From storage devices, DVDs, and more
- From Mail, Safari, and other apps
- From another Photos library
- Where are the photos I imported?
- Browse your photos
- View individual photos
- Play video clips
- Play Live Photos
- View memories
- Personalize memories
- View photo bursts
- View photos others have shared with you
- Interact with text in a photo using Live Text
- Use Visual Look Up to learn about a photo
- Isolate and copy a photo’s subject
- Add titles, captions, and more
- Add keywords
- Show specific types of items
- Find photos by text, content, or date
- Find photos of a person or pet
- Find photos by location
- Create and work with albums
- Group albums in folders
- Create Smart Albums
- Delete photos or recover deleted ones
- Remove duplicates
- Hide photos from view
- Photo editing overview
- Editing basics
- Crop and straighten photos
- Use a filter to change a photo
- Adjust a photo’s light, exposure, and more
- Retouch photos
- Remove red-eye
- Adjust a photo’s white balance
- Apply curves adjustments
- Apply levels adjustments
- Adjust definition
- Apply changes to specific colors
- Reduce noise
- Sharpen a photo
- Change a Portrait mode photo
- Apply a vignette
- Write or draw on a photo
- Use other apps when editing in Photos
- Change a Live Photo
- Change a video
- Edit a Cinematic mode video
- What is iCloud Shared Photo Library?
- Set up or join a Shared Library
- View a Shared Library
- Add photos to a Shared Library
- Remove photos from a Shared Library
- What are shared albums?
- Turn on Shared Albums
- Create shared albums
- Add, remove, and edit photos in a shared album
- Add or remove subscribers
- Subscribe to shared albums
- Use Messages and Mail to share photos
- Use AirDrop to share photos
- Share photos using other apps and websites
- Export photos, videos, slideshows, and memories
- Export a Live Photo as an animated GIF
- Export a still photo from a video
- Create slideshows
- Create projects using third-party apps
- Order professional prints
- Print your own photos
- System Photo Library overview
- Create additional libraries
- Back up the Photos library
- Restore from Time Machine
- Repair the library
- Change where photos and videos are stored
- Photos settings
- Keyboard shortcuts and gestures
Create slideshows in Photos on Mac
In Photos, there are two ways to create slideshows:
Quickly play an instant slideshow of the photos from a day, complete with a theme and music.
Create and save a slideshow project. You select a group of photos, then add text, choose a theme, add music, and set how long each slide appears. You can export a slideshow project to play it on a Mac, iPhone, iPad, or Apple TV.

Open Photos for me
Play an instant slideshow
When you play an instant slideshow, you can select a theme and music for the slideshow, but you can’t customize the slideshow further.
Select some photos in a day, then choose File > Play Slideshow.
Click Themes, then select a theme.
A preview of the theme appears in the pane.
Click Music and select the song you want.
To turn off or select different music, click the song again to deselect it, then select a different song.
Click Play Slideshow.
To stop playing the slideshow, press the Escape key. Press the arrow keys to skip forward or back through the slides, and press the Space bar to pause the slideshow.
Create a slideshow project
Choose File > Create > Slideshow > Photos.
Click the Slideshow pop-up menu and choose New Slideshow.
Type a slideshow name in the Slideshow Name field, then click OK.
To reorder photos, drag photos into the order you want them in the bottom of the window.
You can change the theme at any time. The theme you choose determines text position, fonts, and the transitions that appear between slides.
Choose Theme Songs from the pop-up menu to see music included with Photos, or choose Music to see music from your Music library. Drag the songs you selected to change the order they play in. To delete a song, select it and press Delete.
Set the slideshow to match the length of the selected music: Select Fit to Music.
Set a specific display time for the slideshow: Select Custom, then drag the slider to specify how long the slideshow should play.
Set a transition for the entire slideshow: Select the Transition checkbox, then choose a transition type from the pop-up menu.
Set slides to fit the screen: Select the “Scale photos to fit screen” checkbox.
To see a preview of the slideshow, click the Preview button.
To stop playing a slideshow, press the Escape key. Press the arrow keys to skip forward or back through the slides, and press the Space bar to pause the slideshow.
Note: Slideshows appear in the My Projects folder in the sidebar. If you use iCloud Shared Photo Library , you must choose Both Libraries from the Library pop-up menu in the toolbar to see projects you’ve created.
To share a slideshow, see Export photos, videos, and slideshows .
Add or remove photos and text in a slideshow project
Note: If you use iCloud Shared Photo Library , you must choose Both Libraries from the Library pop-up menu in the toolbar to see projects you’ve created.
Do any of the following:
Delete text from a photo: Select the text in the photo or select the T frame before the photo in the row of thumbnails, then press Delete.
Delete a photo from the slideshow: Select the photo you want to delete, then press Delete.
IMAGES
VIDEO
COMMENTS
To play the presentation, click in the toolbar, then press the arrow keys to advance through the slides. To end the presentation, press the Esc (Escape) key. For more ways to show a presentation, see Play a presentation on your Mac. To close the presentation, click the red close button in the top-left corner of the window.
Step 2: Open PowerPoint. Open PowerPoint and choose a template or open a blank presentation. PowerPoint offers a variety of templates to suit different presentation styles. If you choose to start with a blank slate, you'll have complete creative freedom.
To do this, click on the magnifying glass icon in the top-right corner of your screen. You can then type in "Keynote" in the search bar and hit the "Enter" key. The Keynote app should appear in the search results. You can then click on the Keynote icon to open the app. Once the Keynote app is open, you can begin creating your PowerPoint ...
Learn the basics of using Apple's great presentation software, Keynote! Apple Keynote empowers you to create stunning presentations with dramatic transition...
How to create a keynote presentationStep 1 : To open Keynote, click the Keynote icon in the Dock, Launchpad or the Applications folder.If the theme chooser (...
Here are four steps you can take to learn how to use Keynote to make a presentation. 1. Explore the Keynote App Interface. If you're switching to the Keynote app from another piece of presentation software, my favorite tip is to spend time familiarizing yourself with the interface.
Apply or change slide layouts. Customize a slide master. Change the page orientation of your PowerPoint presentation. Create and use your own presentation template. Create your own theme in PowerPoint. Learn about SmartArt graphics. Compress the picture size. Crop a picture. Add a transparent picture (watermark) to your slides.
How to Make a PowerPoint Presentation on a Mac. Part of the series: Using Apple Computers. Making a PowerPoint presentation on a Mac computer can be done usi...
Mac PowerPoint presentations having a beautiful style can result in having a colossal effect on your audience. A well-crafted PowerPoint presentation can be a deciding factor between a closed deal and a missed opportunity. Keep these seven enlightening and professional tips in your mind before structuring your next ideal presentation.
Next, click on the AirPlay icon in your menu bar and choose your preferred option under the Use AirPlay Display To label. Selecting Extend Desktop is recommended, as this will enable second-screen views like Keynote's Presenter View while still showing your presentation as normal on the external display or projector.
To convert PowerPoint to video on a Mac, open the presentation you want to save and select File > Export. In the export window, next to File Format, select a file format option, such as MP4 or MOV. Choose your video quality, choose whether you want to include narrations, adjust timing, and select Export.
1. Keynote. Price: Free. Best for: Mac users. Get Software. Keynote is one of the top presentation software for Mac and comes included with most Apple devices. With its stunning features and powerful tools, you can bring your slides to life and create the most effective presentations for your clients or your boss.
Step 1: Open the App Store on your Mac. App Store Icon on Mac Launcher. Step 2: In the search bar at the top right, type in "PowerPoint" and press Return. App Store Search Bar. Step 3: The Microsoft PowerPoint app should appear as the first result. Click on the Get button and then Install.
Here's how. In Keynote, click on the File menu and move your cursor to "Export to". A pop-up menu will appear. Select PowerPoint. In the Export Your Presentation window that appears next ...
Step 2. Choose the Theme of the Presentation. Scroll to navigate in the theme chooser and choose the type of presentation you want to make then double click on it to open. Step 3. Change the Layout. To change to a different layout, you can click on the "Layout" button, and then select your desired layout. Step 4.
How to record a voiceover for PowerPoint on a Mac. 1. Open a new or existing or presentation in PowerPoint for Mac. 2. Find and select "Insert" from the top toolbar. 3. Toward the far right side ...
In the Options dialog box, click the Customize Ribbon tab on the left. Then, in the right-hand box that lists the available ribbon tabs, select the Recording check box. Click OK. To get ready to record, select Record on either the Recording tab or the Slide Show tab of the ribbon.
Create a slideshow project. In the Photos app on your Mac, select the photos you want in your slideshow. Choose File > Create > Slideshow > Photos. Click the Slideshow pop-up menu and choose New Slideshow. Type a slideshow name in the Slideshow Name field, then click OK. To reorder photos, drag photos into the order you want them in the bottom ...